
Deciding to learn to fly is exciting, but the way you start matters more than most people realize. Too many new students sprint toward the nearest flight school, take a couple lessons, spend real money, and then hit a wall they didn’t expect—medical delays, aircraft shortages, instructor turnover, you name it.
Before you jump in, take a moment to understand what needs to come first. These early decisions will save you time, money, and frustration once training begins.
Step 1: Define Your Goals
Why do you want to fly?
You don’t need a profound reason, but you need a reason. “It seems cool” is fine, but it won’t help you figure out what kind of school to pick or prepare you for the medical requirements you’ll need to meet.
Weekend, local trips in a Cessna? That’s Private Pilot territory—most people stop there. Airline career? You’re looking at multiple certificates and ratings over the next couple of years. Want to mess around in an ultralight you built in your garage? Sport pilot might be your thing.
Figure this out now because it affects literally every other decision: which medical you need, what training path makes sense, how much this is going to cost you, and whether that flight school down the street is actually a good fit.
Be honest about your goals. Don’t train for an airline career if you really just want to fly a Cessna around on Saturdays.
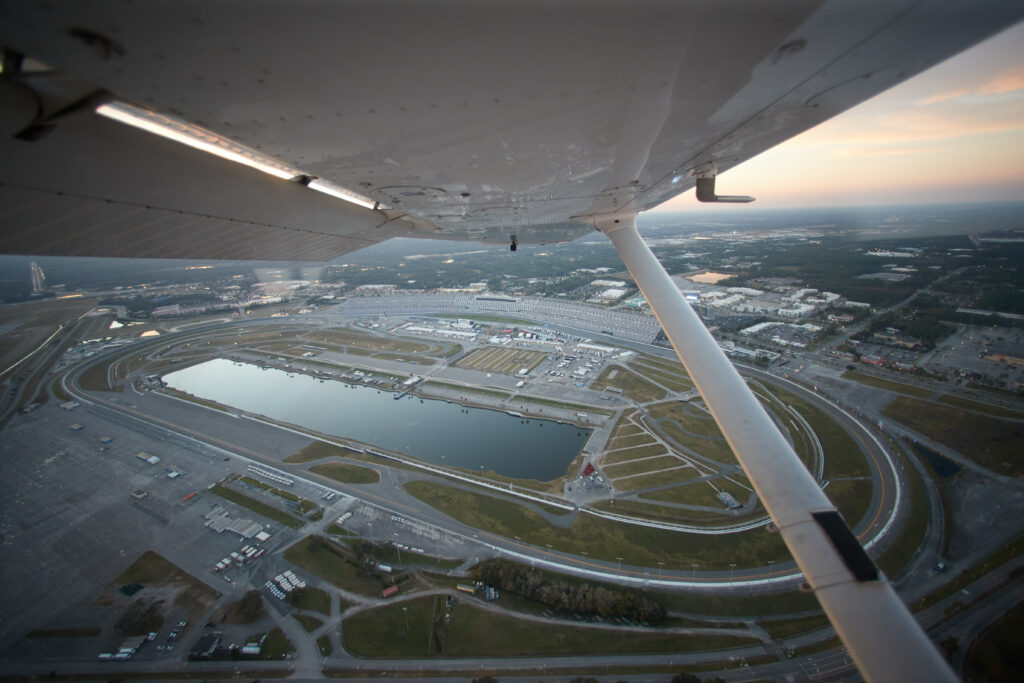
Step 2: Take a Discovery Flight
Before committing to training, go fly. A discovery flight is an introductory lesson where an instructor takes you up, lets you handle the controls, and gives you a real feel for what flying is like—not just the idea of it.
The average cost of a discovery flight is typically around $100–$200 and runs about an hour, including a short briefing on the ground.
Pay attention during your discovery flight
Do you actually enjoy it? Plenty of people love the idea of flying but not the reality. Motion sickness, nerves, discomfort with heights, and realizing it’s louder and more physically demanding than they expected. Those realizations surface quickly. Better to figure that out for $150 than a few thousand.
How was the experience with the flight instructor?
On most discovery flights, you’re paired with the instructor you’d likely be training with, so pay attention to how they teach. Are they patient? Do they explain things clearly? Do they answer your questions without talking down to you? Your instructor sets the tone for your entire training experience.
What about the airplane?
Training aircraft are almost always older—that’s normal. What matters is whether they’re well maintained and appropriate for training. Pay attention to:
• Is the aircraft clean and cared for?
• Do things work as they should (avionics, radios, lights, switches)?
• Does the school have more than one or is this their only trainer?
• Do they have enough aircraft in the fleet to support consistent scheduling?
What’s the overall vibe of the school?
Is the front desk organized or chaotic? Does the staff seem engaged or indifferent? Pay attention to the students, too. Are they relaxed, confident, and moving with purpose? Or do they look confused and frustrated? You can learn a lot about a school in five minutes just by watching how people interact.
If you can, take discovery flights at two or three schools. The differences are usually obvious once you’ve seen them side by side.
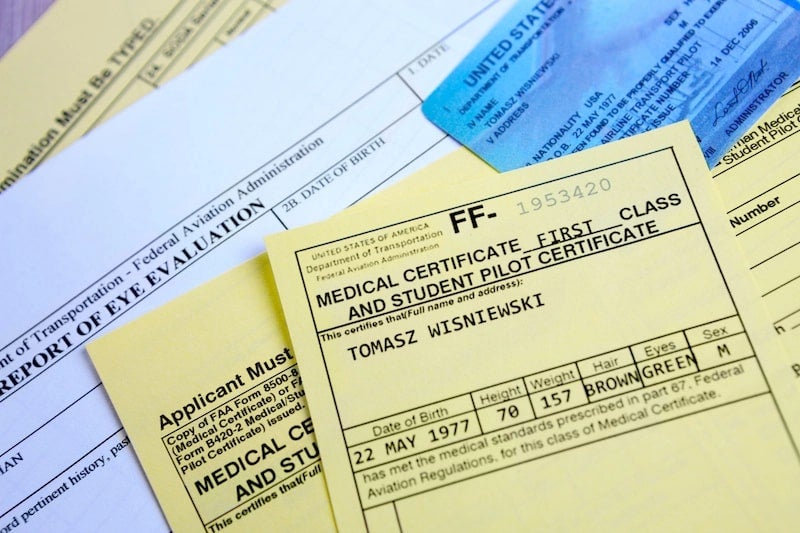
Step 3: Get Your FAA Medical Certificate Early
Before you fly solo, the FAA requires you to hold a medical certificate. In simple terms, a medical certificate is an official sign-off from an Aviation Medical Examiner (an AME) confirming that you meet the FAA’s health standards to act as pilot-in-command. It’s not the same as a physical from your regular doctor. This one is aviation-specific, and it tells the FAA whether you can safely operate an aircraft.
Even though you technically don’t need a medical certificate to start training, I strongly recommend getting one before you log your first hour in the airplane.
When I worked at a flight school, I watched too many students run into medical issues halfway through their training. Some paused for months and a few never came back. By the time the problem surfaced, they had already invested thousands of dollars and weeks or months of effort. Hitting a medical roadblock after you’ve already built momentum feels like training-purgatory. It’s entirely avoidable.
Getting Your FAA Medical Certificate Early Gives Peace of Mind
• You know whether you’re eligible.
• You know whether additional documentation is needed.
• You know you’re not pouring money into training you can’t finish.”
If you haven’t looked into the process yet, you can review the FAA’s official guide to obtaining a medical certificate for pilots, which walks you through eligibility requirements, documentation, and the steps for scheduling your examination.
How the FAA Medical Exam Works
If you’re training for your Private Pilot Certificate, you’ll need at least a Third-Class Medical. To get one, you’ll schedule an appointment with an Aviation Medical Examiner. These aren’t special FAA clinics—most AMEs are regular doctors who completed FAA training to conduct aviation medical exams. Expect the exam to cost around $100–$250.
During the appointment, the AME will check your vision, hearing, and cardiovascular health, and review your medical history. Nothing unusual, but honest disclosure is important.
If you’re unsure about anything in your medical history, schedule a consultation with an AME first. A consultation is not an FAA exam and is not tied to your MedXPress application, so nothing is submitted to the FAA. It’s simply a chance to discuss your situation privately before anything becomes part of your official record.
If a Standard Medical Isn’t an Option
If you run into obstacles with a traditional medical certificate, you may still have a path forward.
BasicMed is another option. It lets eligible pilots fly without holding an FAA medical certificate, as long as they meet the FAA’s requirements and complete the BasicMed steps.
Sport Pilots can use a valid U.S. driver’s license instead of an FAA medical, provided they meet the FAA’s eligibility rules and stay within sport-pilot privileges.
If you think you might fall into one of these categories, it’s worth researching them early to avoid surprises later on.
Step 4: Part 61 vs. Part 141 Schools
These numbers refer to sections of FAA regulations that outline how a flight school is allowed to train you. Most schools fall into one of these two categories, and the style of training can feel very different.
Part 61 Schools
Part 61 is the most common structure. The training is flexible—your instructor can tailor each lesson to your pace, your schedule, and the weather.
You and your instructor follow the FAA’s requirements, but you’re not locked into a rigid syllabus.
Pros:
• More flexible scheduling
• Personalized, one-on-one training
• Often less expensive overall
• Easy to adjust lessons based on progress
Cons:
• Progress can depend heavily on your instructor’s organization
• Without structure, it’s easier to drift or repeat material unnecessarily
Part 141 Schools
Part 141 schools use an FAA-approved training syllabus with defined lessons, stage checks, and required milestones. Think of it like a college program—structured, predictable, and audited by the FAA.
Pros:
• Very structured training with clear progression
• Built-in stage checks help track proficiency
• Reduced minimum hours for some certificates (35 hours for Private vs. 40 under Part 61)
• Often preferred for career-oriented students
Cons:
• Less flexibility in scheduling and lesson order
• Can be slower to adapt to an individual student’s pace
• Often comes with higher hourly rates for aircraft and instruction
So, which flight school should you choose?
For most recreational students working on a Private Pilot Certificate, Part 61 is usually a great fit. It’s flexible, personalized, and often more budget-friendly.
If your goal is a professional aviation career and you plan to earn multiple ratings, Part 141 can save you time and money in the long run because of the reduced hour requirements and formal structure.
Some schools operate under both parts. That’s not uncommon. Ask them which program they recommend for your goals and why.
Step 5: Choosing Your Flight School
Choosing a flight school is one of those decisions that looks simple from the outside, but once you start digging, you realize how much it affects your entire training experience. I’ve visited a lot of schools over the years, and the same truth keeps showing up: the right environment will move you forward, and the wrong one will make every step harder than it needs to be.
Here’s what to pay attention to:
The Airplanes
Training aircraft don’t need to be new, but they do need to be cared for. Take a walk around the ramp. Are the windows clean? Are the interiors tidy? Do the radios work without crackling every time someone keys up?
Just as important is the size of the fleet. A school with two airplanes and twenty students is setting you up for cancellations and delays.
The Certified Flight Instructors
Instructor turnover tells a big story. If everyone you meet has had two or three instructors in a short period of time, that’s a sign the school struggles to keep CFIs. And every time you switch instructors, you lose momentum while you learn someone else’s teaching style.
Ideally, your instructor stays around long enough to guide you through major milestones. Consistency is one of the biggest (and most underrated) factors in making good progress.
How the School Runs
You can learn a lot in five minutes just by standing near the dispatch desk. Do students seem prepared and confident about what they’re doing next? Are instructors moving with purpose between lessons? Or is the front desk juggling paperwork and keys like they’re putting out fires all day?
Training works best when scheduling is predictable. Ask how far out you need to book, whether online scheduling is available, and if you can reserve recurring time slots. If it feels chaotic before you even start, it won’t magically get better once you’re in the system.
The Full Cost (Not Just the Hourly Rate)
Flight schools love to advertise low hourly rates, but those numbers rarely tell the whole story. Ask how they bill aircraft time (Hobbs or tach, wet or dry), what the instructor rate includes, and whether there are extra fees—landing fees, fuel surcharges, ground instruction charges, etc.
The school that looks cheapest on the website often ends up the most expensive once everything is added up.
Talk to the Students
This is the fastest way to get the truth. Students are honest, and they’re living the experience you’re about to walk into. Their insight is invaluable, and you’ll get a clearer picture from them than from any brochure.
Step 6: Finding the Right Flight Instructor
Your instructor will shape your entire training experience. They’re the person sitting next to you during the good flights, the frustrating ones, and every milestone in between. So choosing the right fit matters—more than most new students realize.

New vs. Experienced CFIs
New instructors often have more availability and remember what it feels like to be in your shoes. Experienced instructors are great at diagnosing issues quickly but tend to have busier schedules. Neither is automatically “better.” What matters is whether their teaching style matches your learning style.
Try More Than One
Most schools will let you fly with a few different instructors. Take them up on that. It is important to choose the best CFI for you. You’ll feel the difference almost immediately when you’ve found the right match.
Step 7: Start Your Ground School Early
You don’t need to be deep into flight training to start learning the basics. In fact, most of the real benefit of ground school happens before you ever set foot in an airplane.
When you start studying early, you give yourself time to understand the foundational pieces (weather, airspace, regulations, aerodynamics) at a pace that isn’t rushed or tied to your next flight lesson. Start building familiarity before the pressure starts.
And there’s something valuable about walking into your first lesson already recognizing a few concepts. You won’t be an expert, but you won’t be starting from zero either. That little bit of confidence makes the entire beginning of training feel lighter and less intimidating.
Go through the lessons casually, take a few practice questions here and there, and let the information settle in. By the time you begin formal flight training, you’ll be ahead of the curve without even trying – learn more about starting online ground school early for tips on getting a head start.
Where All the Steps Come Together
Starting flight training isn’t just about booking a lesson and hoping it all works out. It’s a series of choices—figuring out what you want to do with your certificate, making sure you’re medically eligible, trying a few discovery flights, understanding how schools operate, finding an instructor who actually clicks with you, and giving yourself a head start with the ground knowledge. When you take the time to work through those pieces first, you walk into training with direction instead of guesswork. And that’s what makes the difference between students who feel lost and students who make steady, confident progress. If flying is something you truly want, this is how you set yourself up to enjoy the process from day one.
Start a Free Two-Week Trial at MzeroA
Love our videos and eager to learn more? Are you passionate about aviation, or curious to learn how to fly? Now’s the perfect time to explore further – with a 2-week FREE trial of MzeroA’s Online Ground School. Take that “Discovery Flight” into MzeroA’s courses to see if we are the right fit for you!